2. Wash the paper/wire mesh filter element in lukewarm water with a mild detergent. Do not
strike filter element on a hard surface to dislodge dirt.
3. Allow filter element to either air dry or blow it dry, from the inside, with low pressure air. Do
NOT use air cleaner filter oil on the Harley Davidson paper/wire mesh air filter element.
4. Hold the filter element up to a strong light source. The element is sufficiently clean if light is
uniformly visible through the media.
5. Replace the filter element if damaged or if filter media cannot be adequately cleaned.
6. Install baseplate gasket, air filter element and bracket if removed. Tighten bracket screws.
Refer to Air Cleaner Fastener Torque.
7. Install air cleaner cover. Apply a drop of LOCTITE THREADLOCKER 243 (blue) to the
threads of the cover screw and tighten. Refer to Air Cleaner Fastener Torque.
Air Cleaner Fastener Torque
FASTENER TORQUE
Air filter element bracket
screws
108 132 in lbs (12.2 14.9
Nm)
Air filter cover screw 36 60 in lbs (4.1 6.8 Nm)
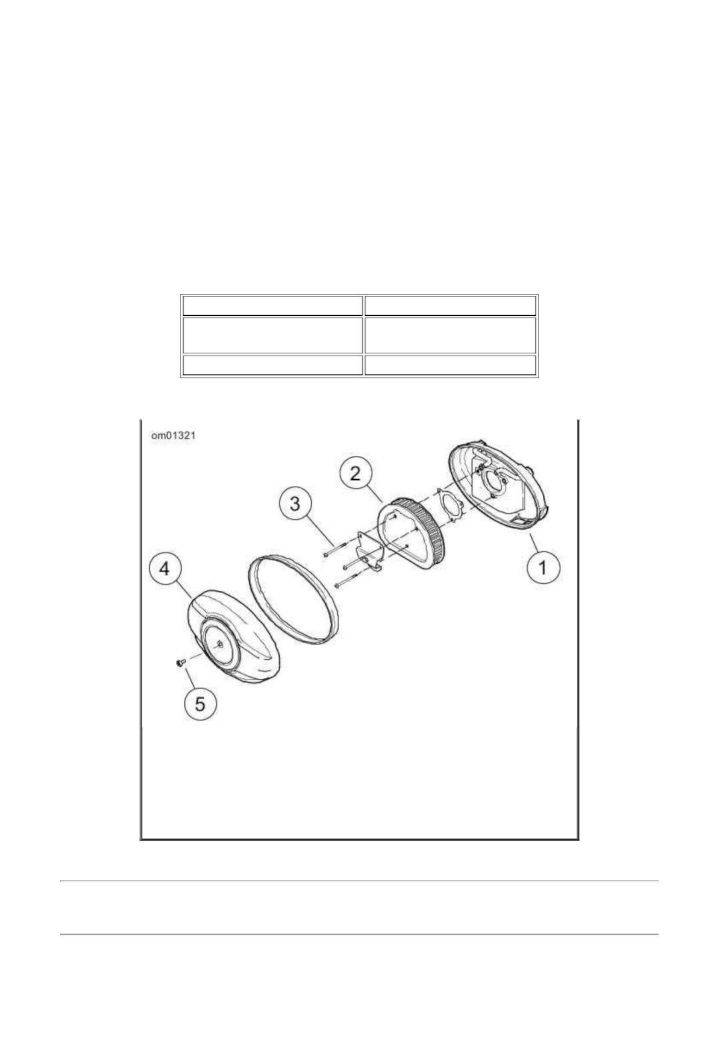
1. Backplate
2. Filter element
3. Screws
4. Cover
5. Cover screw
Air Cleaner: Twin Cam Models
Headlamp: Single Headlamp Models
Removal
1. Remove screw at bottom of headlamp door (chrome ring). Remove headlamp door.
2. See Headlamp Retaining Screws (typical). Remove screws securing headlamp
assembly.
3. Disconnect headlamp connector.