fasteners called bail head studs.
NOTE:
If your vehicle (international only) does not have the wire form "bail", use a flat bladed screwdriver
to turn the studs.
1. Rotate bail head studs 1/4 turn counterclockwise.
2. Remove saddlebag.
Installing
Carefully place saddlebag in position on saddlebag rail and align the bail head studs with the
support bracket fasteners.
1. See Hard Saddlebags. Fasten studs by pushing into support bracket fasteners and turning
1/4 turn clockwise.
2. Check that studs are securely fastened.
Adjustments
If the latches become loose, you can adjust the latch fingers.
Adjust the latch fingers only enough to enable them to
properly engage the latch hinge. Bending latch fingers
back and forth can overstress the metal and weaken the
fingers. (00169a)
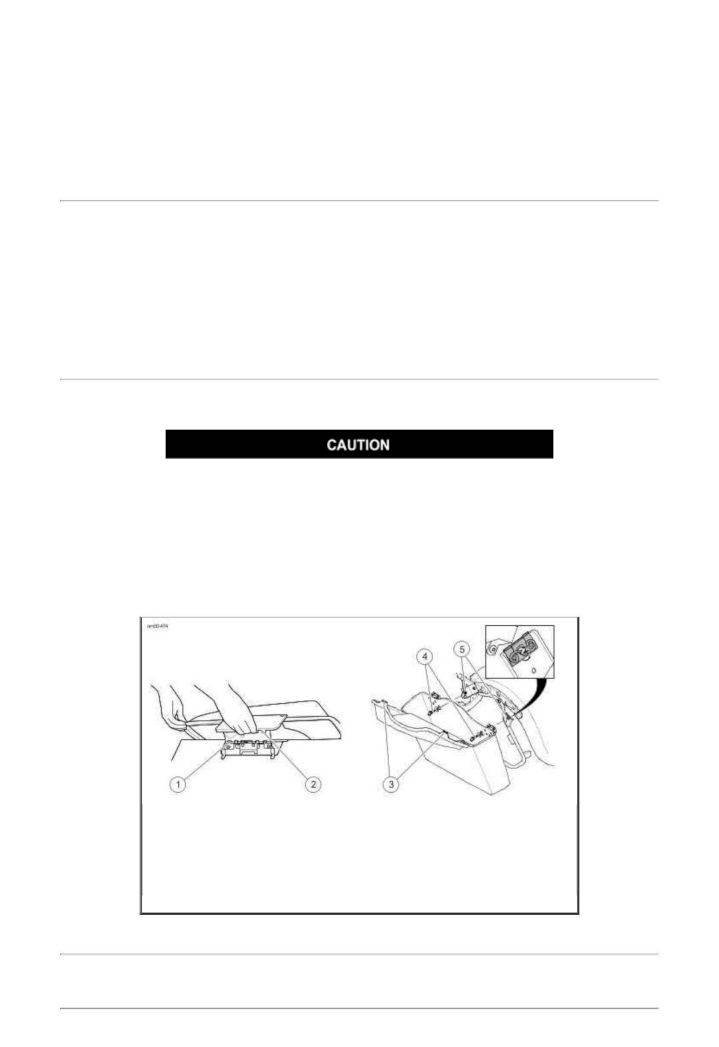
1. Bend the fingers until they firmly engage the hinge.
2. See Miscellaneous Lubrication for lubrication details.
1. Hinge
2. Latch
3. Anchor tabs
4. Bail head studs
5. Support brackets
Hard Saddlebags
Windshield: FLHR/C
Removal
1. See Windshield: FLHR/C. Lift the wire form latch springs at either side of the windshield